We can think of images as static information we receive through our eyes, collections of ink or pixels. This includes photographs, charts/graphs, and abstract shapes. Images can communicate powerfully on their own, and as composers, we know that new expressive possibilities emerge when we thoughtfully combine images with written text. This page will help you develop a basic understanding of how to compose (with) images.
Process
Your image is a rhetorical document. It’s an argument meant to shape how people think, feel, and act. Before worrying about matters of visual design, spend time considering the following questions:
Purpose: What do you want your image to accomplish?
Genre: What kind of document are you trying to create? What are the common features or conventions of that kind of document?
Audience: To whom do you most want to speak? Who most needs the information you’re trying to share, or who will most likely want to read your document?
Topic: What is your central concern? Does it have a practical focus?
Ethics: What is your relationship to the topic? What gives you authority to speak on the issue?
Exigency: Why is this issue important and in need of immediate attention?
Paper and Pencil: It’s always a good habit to sketch out your ideas before borrowing equipment, learning software, or using technology.
Equipment
Determine your needs for capturing new images. Based on those needs, decide the most appropriate technology to use. What technology–a phone camera or digital camera–meets the needs of your project?
Rule of Thirds
The Rule of Thirds is worth thinking about when composing your shots. If you divide up your camera’s frame into horizontal and vertical thirds, you have a grid like a Tic-Tac-Toe board. Place the focal point of your content along those lines or at their intersecting points. For a more detailed explanation, read Darren Rowse’s post about the “Rule of Thirds” from Digital Photography School website.
Camera Distance
Wide shot: a shot taken from far away, used to represent a wide expanse of a location. People appear as small figures without distinct characteristics. Sometimes it’s used for an Establishing Shot because it signals place.
Long shot: closer than a wide shot, it’s used to show bodies in motion (people, head to toe). One variety is the Extra Long Shots that are taken from far enough away to indicate the surrounding location as well as the bodies in motion.
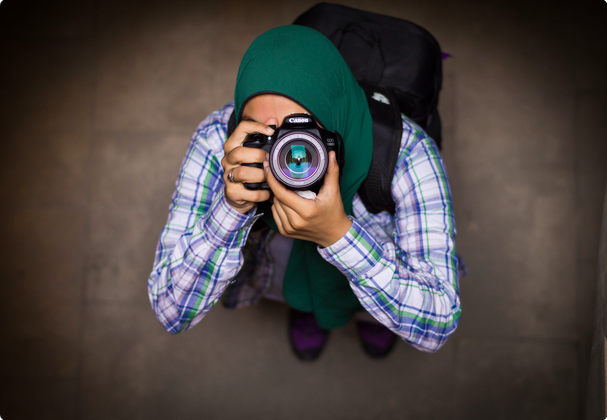
Medium shot: frames the human subject from right below the waist to just above the head.
Close-up: shows only the head and shoulders of the person being filmed.
Extreme Close-Ups: capture images as if through a magnifying glass.
Camera Angle
Angles are an important consideration when composing your shots. Most of the time, your shots will be straight-on (eye-level) shots. Here, the camera is held parallel to the ground, on the same level as the subject you’re shooting. But you might use different angles for effect.
You also have the option to position the camera from a place below the subject (low angle shot). Here, the camera is angled up, giving your viewers the experience of looking up at your subject.
You also have the option to position the camera above the subject (high angle). Here, the camera is angled down, giving your viewers the experience of looking down at your subject.
Note: Because of the different impression each camera angle creates, make sure you choose them carefully
Basic Lighting
Natural light is usually your best bet, but it is not always available. When you can work with sunlight, use it indirectly: shoot in the shade or use reflectors (direct sunlight is often too harsh and can cause deep shadows). If you have to use artificial light, your light source should be in front of your subjects, not behind them. Most cameras have different settings for different types of light, allowing you to set the camera for indoor use, nighttime shots, capturing people in motion, or a whole range of others. Use these settings whenever possible.
Make plans to take similar shots at the same time: all of your outdoor shots first, then all of your indoor shots, and so on.
Finishing Up
Finishing up an image usually means “rendering” it to make it easy to share with other people. Often that means “exporting” the proprietary file from Photoshop (PSD), Illustrator (AI), or InDesign (INDD) into a more universal format (like JPG, GIF, or PDF). The proprietary formats are great when you’re still working on the project and need to manipulate and edit the images in Photoshop, Illustrator, or InDesign. These formats keep the various layers of the image separate and will allow you to edit and alter the image as much as you like. However, there are two main “limits” to the proprietary formats: 1) the file size can be quite large (depending on the file, up to 100 MBs) and 2) the PSD, AI, or INDD file can only be opened by the expensive proprietary software. In contrast, the rendered file will be “flattened” into a single layer, which will decrease the file size and make it more universally shareable. Unfortunately, the flattened nature of JPGs, GIFs, and PDFs make them difficult if not impossible to edit because all the separate layers have gone away.
One last consideration: when you’re rendering a file that is meant for print, you should set the DPI (dots per inch) to 300 to achieve the sharpest image quality, if printed. If you’re rendering a file to appear exclusively on the web, set the DPI to 72 to ensure the image will load quickly in your user’s browser.
Includes a large collection of free stock images as well as templates for creating a range of designs, from social media posts and brochures to menus and flyers.
Very large collection of photographs, illustrations, and clip art (many free). Also a place to upload and sell images.
Free access to high quality, Creative Commons licensed photographs.
“Download free and premium stock photos and illustrations for websites, advertising materials, newspapers, magazines, ebooks, book covers and pages, music artwork, software applications and much more. All our free images are of high quality, produced by our community of professional stock photographers and digital illustrators. Our free photos and illustrations are ideal for business, personal and educational use. Every image is free, with an option to buy larger images at reasonable prices.”
A smaller collection that includes photos, textures, and backgrounds.
Google Images: Advanced Search
The advanced search page where we can filer by usage rights.
This is also all free for any use and has multiple search features.
“Looking for high resolution stock photos for your illustration, comp or design needs? Search morgueFile for free reference images. Yes, they’re all completely free. Whether you’re an illustrator, art director, instructor or looking to add a defining visual to a presentation.”
Lesson 1, about composition and impact is helpful for students and teachers working on new media projects.
A free database of images, supplied by the community of photographers. Images are organized in many categories such as Animals, Light, Recreation, and Technology.
Stock Vault /TextureVault / Shutter Stock
Includes 44,000 photos, along with textures and video clips; many are free. Stock Vault also offers tutorials in Photoshop, Dreamweaver, and CSS.
Working with images composed by other people can both simplify and complicate your composing process. It might seem easier to find stock photos on Google Images, but those images were shot for different purposes and their compositions (in terms of camera angle or distance, for example) may not be well suited for your purpose. Additionally, because you didn’t create those images yourself, you don’t hold copyright and therefore, you don’t automatically have legal right to use them. If you use Google Images, always search for copyright free images. Other sites like Flickr and Morgue File are also great places to find copyright free and high resolution images.
Copyright Information
Copyright Fair Use and How it Works for Online Images (2011) By Sara Hawkins
Easy to understand summary of copyright law regarding images; uses clip art and images that illustrate concepts.
Copyright FAQ by the U.S. Copyright office
Helpful Frequently Asked Questions with links to other documents and laws about using someone else’s work.
THE DIGITAL MILLENNIUM COPYRIGHT ACT OF 1998
18-page document detailing the new law.
Tips
A blog that teaches basic design principles and offers examples and exercises. A useful tool for learning and teaching design in new media.
Concise page that discusses Gestalt Principles and provides examples.
Some Ideas about Composition and Design Elements, Principles, and Visual Effects (2012) by Marvin Bartel
Shows how to teach basic design elements. The design of the page itself reinforces the principles taught. Very useful source for students and teachers.
Examples
Using New Media to Shed Light on Old Art Narratives
Short post, with embedded video, that discusses and shows how new media can reinvigorate visual narratives for a 21st-century audience. The video is a strong example of such strategies.