An Introduction to Adobe Indesign
Transitioning from processors such as Word to programs like Indesign can be challenging. These resources are for learning the basic principles of Indesign so that you can create products like flyers, ebooks, or posters. This page provides simple instructions for common design elements and then links additional videos for support.
- Adobe Support (for all Adobe products):
- Adobe InDesign Learn (tutorials):
- Adobe InDesign Guide from the University of Wisconsin-Madison.

Common Indesign Concepts:
Workspace:
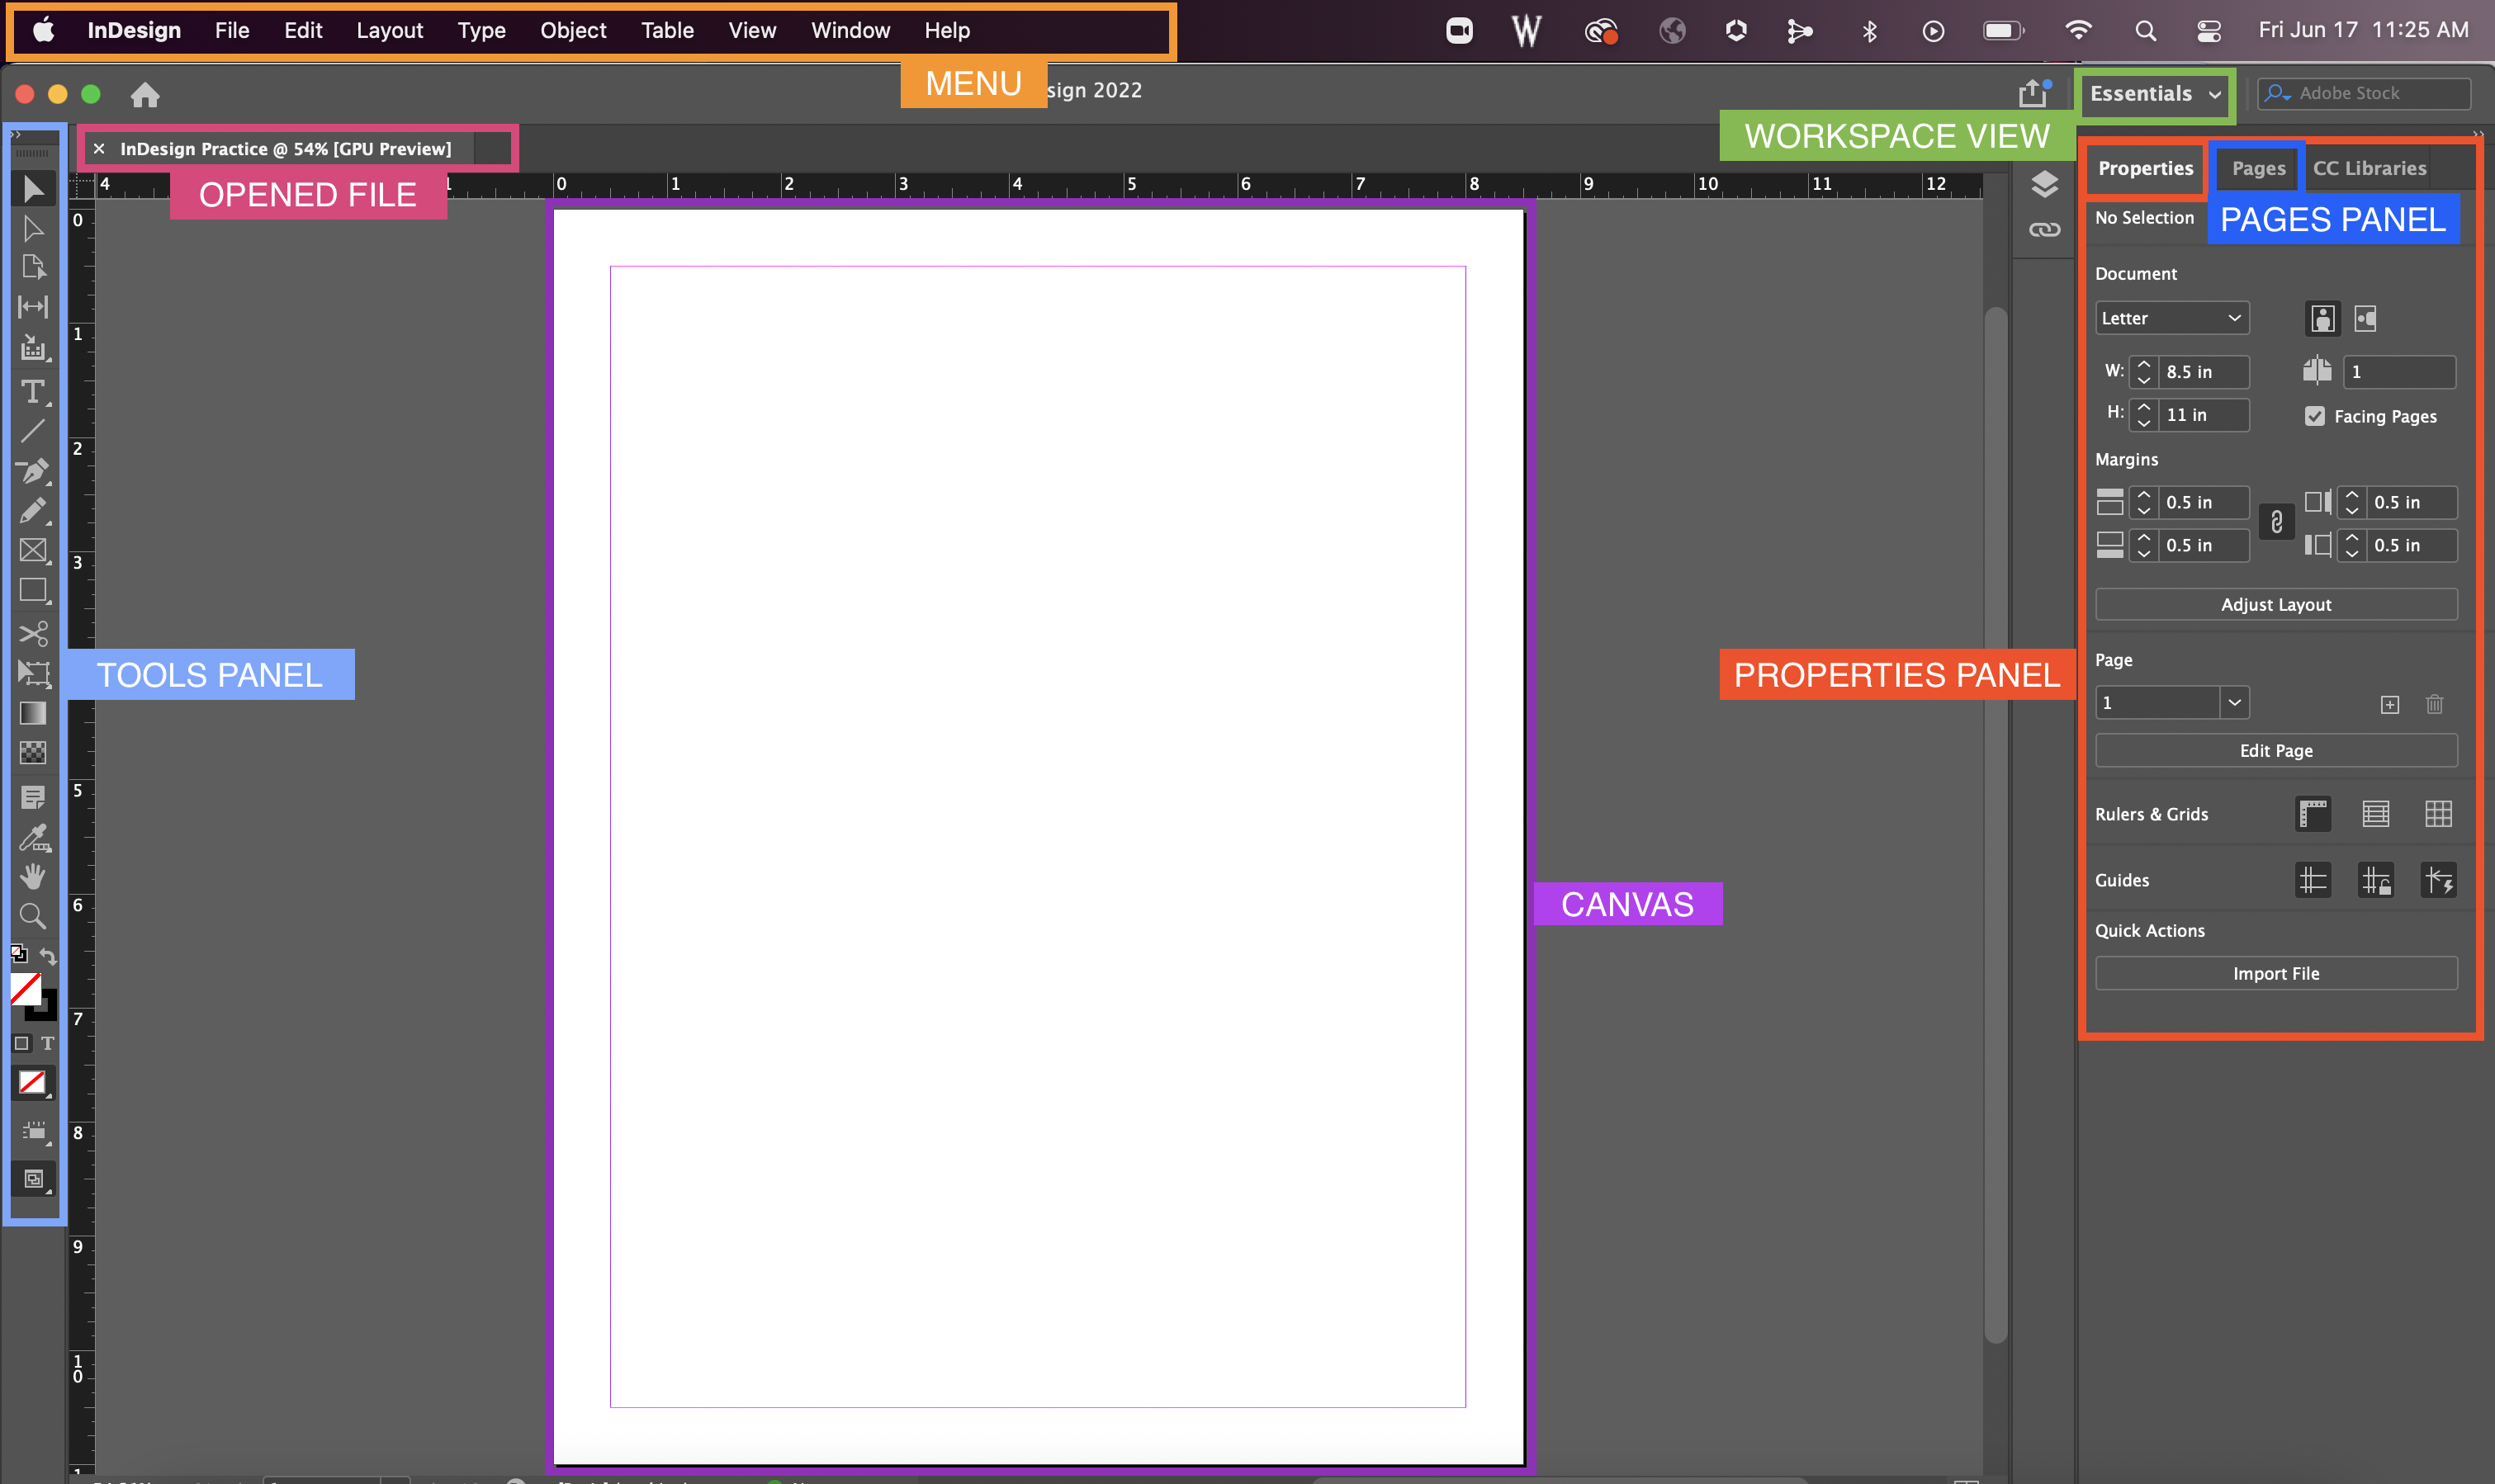
Before you begin creating Indesign projects, it’s helpful to familiarize yourself with the Indesign workspace. The image above (Adobe InDesign 1 from UW Madison), shows the different components of the Indesign workspace. In the tips below, we will mostly reference the Tools Panel to the left. Indesign has lots of settings, many of which you may never need for your projects. Do not become overwhelmed by the number of options. If you are in doubt about what certain options do, a quick Google search or reference to the Adobe guides linked within this article can help you learn about the different settings Indesign provides.
Creating a New Document:
Before creating your Indesign document you’ll want to consider how your document will be published. Will it be physical (printed) or used on the web? Knowing also how individuals will interact with your document will help you decide how to format your new project. Some documents such as journals or handouts may be shared both on the web and physically, consider creating these documents to a standard size and exporting as a pdf. Do not worry if you are not yet sure the specifications of your document, you can always change things like dimensions, margins, and export instructions later.
Once you have created your document you can begin adding design elements.
Adobe tutorial for creating a new document
Adding a page:
Go to the main menu at the top of the program. Select: Layout > Pages > Add New
Adding text
- Insert a new text box using the “T” button on the left side tools panel.
- Add text by either typing directly into the text box or by copying and pasting from another program
An Indesign Tip: Remember that, unlike Word or Google Docs programs, Indesign does not spellcheck your text. Consider typing up your text in a program that does so you can avoid grammatical errors.
Formatting your text
Once your text is added to your document, you’ll probably want to adjust the design. In Indesign, you can control font, size, and color in two ways.
- Using the “Type” menu found at the top program menu, you can manually set your text design just as you would in Word.
- You can format text through Paragraph and Character Styles.
Paragraph & Character Styles
When you are creating multi-page documents (for example: ebooks, journals, or long handouts), Indesign allows you to save your formatting choices with paragraph and character styles. These options allow for consistency throughout your document.
To create a paragraph or character style:
- Add these options to your side menu by going to: Windows > Styles > Paragraph Style
- Open your paragraph style panel is open, click the add new style icon
- Name your style (for example: “Body Paragraph” or “Block Quotes”). This helps you to remember what each style is for.
- Most design elements will be found under the tabs: “Basic Character Formats” (for fonts, size, and spacing) and “Character Color” (for text color).
Once you have selected all your options, click “OK” at the bottom of the menu. You have now created a new style! To use your paragraph style, simply highlight the text you want to format and click your style in the Paragraph Style Panel.
Character Styles are set the same way as paragraph styles. Rely on paragraph styles in order to set things like overall font, spacing, and indentation. Character styles are good for individual word formatting such as bold or italics.
Adding Large Amounts of Text
Unlike Word or Google Docs, Indesign does not automatically add pages for long bodies of text. If you want to add a large amount of text to your document (for example, 2-3 pages worth of a story), you must tell Indesign where the text should go.
You can do this in two ways:
- If your text takes up more than one page worth of text and you want the text to take up full pages:
- Add a new page
- Select the plus sign at the bottom of your text box
- Select the shift button
- Click on the next page (where you want the rest of your text to continue)
- If you want the text to continue in different places (such as around images or in 2 pages)
- Add a new page
- Add a text box (where you want the remaining text placed)
- Select the plus sign from the last text box
- Click upper corner of text box
- (repeat until the text is finished)
The difference between these two methods is the use of the shift button. The shift button will paste text continuously, adding pages until the text is completely in the document–adding text without using the shift button, however, will only fill the text box you have created and pasted the text into.
More resources for adding and formatting text:
- About character and paragraph styles
- How to Add Text to InDesign
- How to use InDesign paragraph styles
- Creating and Applying Paragraph and Character Styles in Adobe InDesign CS6
Adding Images
One major distinction between word processors or drag-and-drop software (like Canva), is that images cannot be placed in documents simply by pasting them on the page. Indesign requires the use of frames and anchors to ensure that images stay where you want them to be.
To add an image to the page:
- Place a frame in the document where you want your image to go using the graphic frame button (square with x) in the tools panel
- Select the frame
- Go to file > place and select your image from your files
If your frame looks empty after placing the file, your graphic frame may be too small to fit your image. Try dragging or expanding the frame and then resizing your image to fit.
An Indesign Tip: If your image looks blurry (but is high quality), don’t worry. Indesign displays a lower-quality image in your workspace when working with large files. Try exporting your document to check that your image quality meets your printing needs.
Anchoring an Image
Like a literal weight, anchoring in Indesign allows your image to stay in place during the export or printing process. If you do not anchor your images, your layout and design could suffer during the exporting process.
Images in Indesign are anchored to other objects in your document. In order to anchor an object:
- Ensure that your image is placed in a graphics frame (explained in the previous paragraph).
- Click the blue square located in the top right-hand corner of your image
- Drag the blue square to the object or text you want to anchor your image to
Adding Alt-Text
Alt-text or alt-tags are one way of document accessibility. Alt-text provides descriptions of images within your document for those who may be viewing the document in a screen reader. If your document is only being printed, alt-text is not necessary.
Alt-text for images should be 1-2 short, descriptive sentences. For example in the image below of the horned frog, an effective alt-text might simply say: “Image shows official TCU horned frog graphic in purple.” However, if the image is not important and merely decorative, you may only put “decorative object.”

Adobe outlines the instructions for adding alt-text in these five steps:
- Select an image that does not have alt text.
- Choose Object > Object Export Options.
- Select the Alt Text tab in the Object Export Options dialog box.
- Choose Custom from the Alt Text Source menu.
- Enter the description in the text field, and click Done.
Adding alt-text is good practice, even when you do not believe that your documents will be read using screen readers.
More resources for working with images:
- Placing Graphics (From Adobe)
- Placing and Formatting Images (Video Tutorial)
- Indesign Accessibility (Alt-Text Tutorial)
- About Anchored Objects
Final Thoughts
Indesign may feel daunting, however, it is an important tool for those in the publishing and design industry. The steps outlined on this page are just a few of the basic principles and tools which can help you to create your own documents. Because Indesign is a popular software, there are many tutorials and forums online that can help you when you get stuck or are not sure how to proceed with a project. In addition to the resources listed on this page, remember that search engines are your friend. Even experts need help troubleshooting sometimes.
If you find that you are unable to locate a solution, or need general help with a digital project do not hesitate to reach out to CDEx staff for assistance with your Indesign project. Drop by walk-in hours or make an appointment with CDEx anytime.